

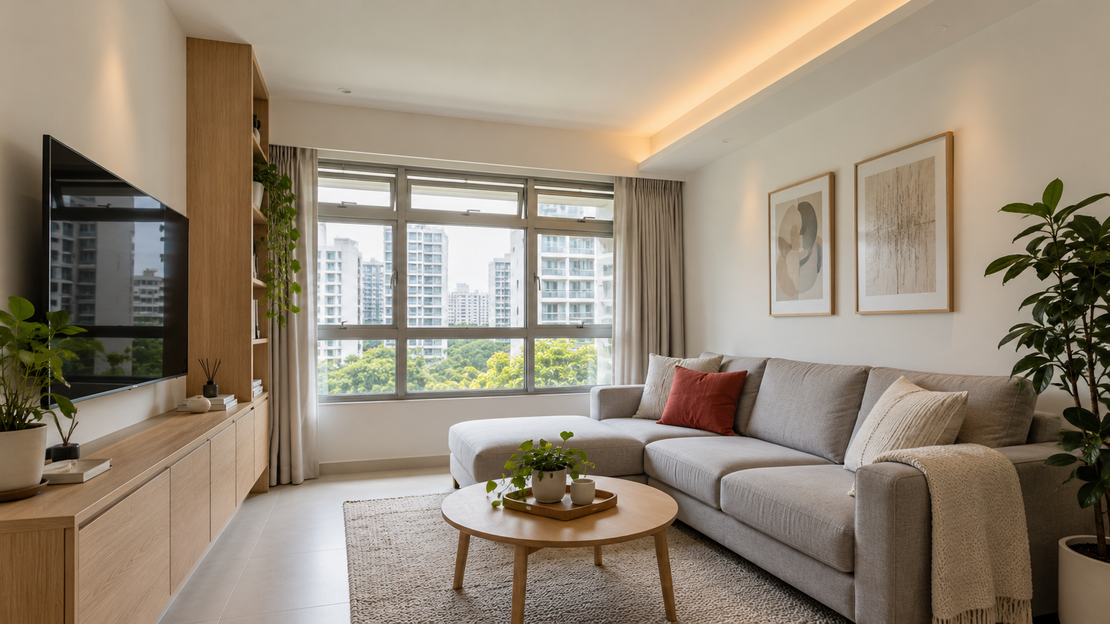
A cove-lit ceiling can look appealing in a renovation photo. In your flat, the same feature may meet a tall wardrobe, compete with a ceiling fan or leave an awkward strip above the air-conditioning unit.
The right false ceiling design starts with a purpose: concealing a planned cable route, adding indirect lighting or defining the dining area. Decide where that feature earns its space before extending it across the room.
When viewing HDB flats for sale, look beyond the ceiling finish. Notice its relationship with beams, built-in furniture and existing services. Keeping the original ceiling can be worthwhile if you mainly want a different lighting arrangement.
Choose How Much Ceiling You Need to Lower
A false ceiling adds a surface below the existing ceiling. A partial design leaves some of the original height exposed, while a full design lowers the ceiling across the chosen room. Neither approach suits every flat.
L-box along selected edges
Lighting around one area
The border can clash with fittings or built-ins
Perimeter cove
Indirect light around a room
More edges to clean and maintain
Dining-area panel
A defined dining zone
Ties the feature to the table position
Plain full ceiling
An even finish
Lowers the whole room
Bedroom feature strip
A focused lighting feature
Must work with the bed layout
Curved feature
One softer visual detail
Needs more precise setting-out and finishing
Ask your designer to show the proposed ceiling height and edges alongside the furniture plan. A ceiling-only drawing can hide clashes that become obvious once the wardrobe, curtain track and air-conditioning unit are included.
Start With the HDB Requirements
HDB’s residential building-work guidelines list false-ceiling installation in a flat as not requiring a permit when the stated conditions are met. HDB requires at least 2.4m clearance from the finished floor; this clearance requirement does not apply to toilets and bathrooms. This article focuses on living rooms, dining areas and bedrooms.
HDB also requires non-combustible materials and prohibits enclosing gas pipes within false ceilings. Fasteners used to fix a false ceiling to the underside of a reinforced-concrete slab must not exceed 6mm in diameter or 40mm in penetration depth. Flat owners are responsible for removal and reinstatement when inspection or maintenance requires it. Meeting the height requirement alone is therefore insufficient.
Under HDB’s important renovation information, owners must engage a contractor listed in the Directory of Renovation Contractors. HDB’s renovation-permit guidance also says that works not requiring a permit must comply with the stated guidelines; otherwise, they are treated as unauthorised works.
HDB has separate conditions for adding to an original HDB-provided false ceiling and installing fixtures on one. For some buildings constructed before 1991, particularly top-floor pitched-roof buildings, HDB warns that original false ceilings may contain asbestos-containing materials. Ask the contractor to identify the applicable category and guidance before any alteration starts.
1. Use an L-Box Along Selected Edges
An L-box is a lowered border along selected sides of a ceiling. In a living room, it can frame the sofa area or provide a place for lighting without covering the centre of the room.
Consider following one or two edges rather than automatically outlining every wall. This can suit a room where one side has a beam or planned cable route while the rest needs no additional ceiling work.
Check where the border ends. If it stops just short of a tall cabinet or meets an air-conditioning unit awkwardly, revise its length or position. A simple line with a clear endpoint can be easier to work into the room than several short sections.
2. Add a Perimeter Cove for Indirect Lighting
A cove hides the light source behind an edge so that light falls onto a nearby surface. Consider it when you want background lighting for evenings alongside the lights used for reading, working or eating.
Ask to see the intended effect from the sofa, not only from the middle of the room. The opening and position should work from where you sit. Cove lighting does not automatically provide enough light for every activity.
Plan how you will reach the recess for cleaning and replace the lighting components. Before accepting a continuous border, compare it with a cove along one wall. That shows whether you need a room-wide feature or a smaller intervention.
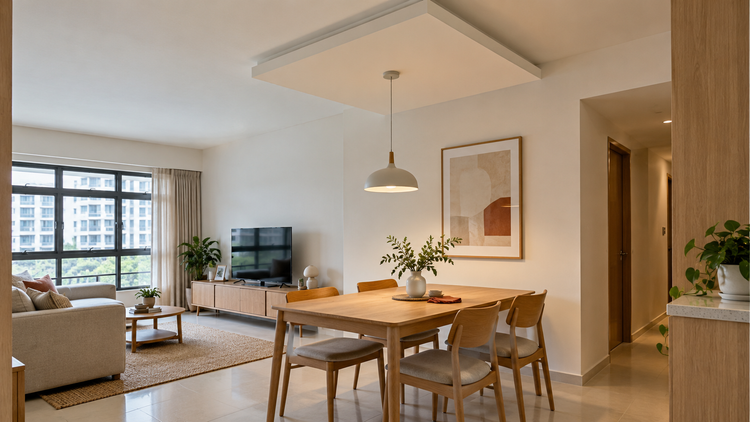
3. Define the Dining Area With a Single Panel
In a shared living and dining room, a lowered panel above the table can give the dining area its own visual boundary without repeating the feature above the sofa.
Draw the panel over the table in its usual position, then show the table extended for guests if applicable. Also consider whether you may later turn it or move it towards the wall. A feature centred on today’s arrangement may look misplaced after a furniture change.
If you want that flexibility, a plain ceiling with an adaptable lighting arrangement may be a better starting point. The ceiling does not need to define every activity zone.
4. Keep a Full False Ceiling Plain
A flat, continuous ceiling may suit a room where there is a clear reason to conceal planned services across a larger area. Keep the finish simple if the room already has patterned flooring, prominent cabinetry or a feature wall.
The trade-off is the loss of height throughout that room. Compare the proposed finished height with a partial design rather than judging only the neatness of the render.
Show any ceiling fan on the drawing from the start. Its mounting, support and blade clearance must follow the chosen model’s installation instructions. Do not assume that the ceiling board is an adequate fixing point or that meeting HDB’s ceiling-height requirement establishes a suitable fan installation.
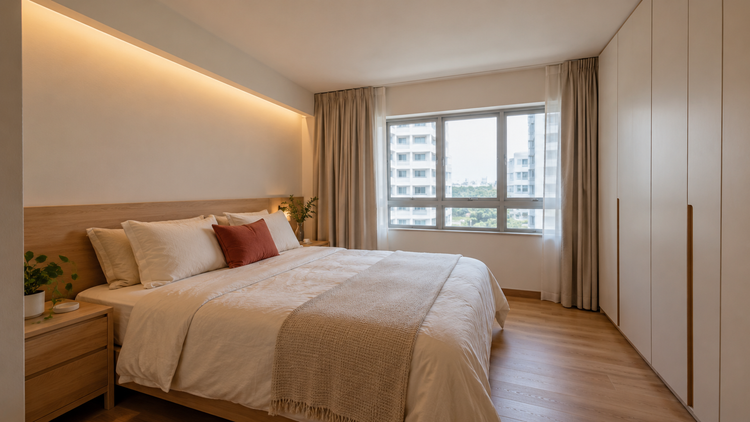
5. Limit a Bedroom Feature to One Strip
For a bedroom, a feature strip above the headboard or along one wall may provide the detail you want without lowering the entire ceiling. It can also keep the ceiling visually quieter around a large built-in wardrobe.
Review the lighting while lying in the intended bed position. A fitting that looks neatly aligned on a plan may be uncomfortable to look towards from the pillow. Ask for the light source and direction to be shown rather than approving evenly spaced dots alone.
Check the wardrobe’s upper doors, curtain movement and access to the indoor air-conditioning unit in the same drawing. The strip should fit around these everyday functions rather than make them difficult to use or service.
6. Use One Curve as a Feature
A curved edge can suit a seating or dining area if you prefer a softer shape. Keep it to one deliberate feature, especially when the room already contains several competing lines.
Ask the designer to show where the curve begins and ends in relation to walls and furniture. A shape that works in a perspective image may leave an awkward narrow section beside a cabinet when drawn to scale.
Ask for the curved setting-out and finishing to be itemised in the quotation. Comparing it with a straight-edged version helps you decide whether the shape is worth any additional work quoted for that design.
Plan Lighting and Future Access Together
Before the ceiling is closed, agree how lighting components and concealed services will be reached. Ask which parts can be removed for maintenance and whether repairs would involve cutting, patching or repainting. An access point should remain usable after the furniture is installed.
HDB’s electrical-work guidelines require wiring installation work to be carried out by an Energy Market Authority (EMA) Licensed Electrical Worker. Coordinate the ceiling layout and electrical plan before construction so that the design and its wiring are considered together.
If you are choosing among HDB flats for rent, assess the existing lighting and ceiling arrangement during the viewing. Any change depends on the tenancy agreement and may require the owner’s consent. A layout that already works may be more practical than planning a new false ceiling.
Keep the Original Ceiling When It Meets Your Needs
A false ceiling is worth considering when its lighting, concealment or layout function justifies the space it takes. Compare the proposed design with the original ceiling and surface-mounted lighting, then choose the option that works with your headroom, furniture and maintenance needs.
Disclaimer: The information is provided for general information only. PropertyGuru Pte Ltd makes no representations or warranties in relation to the information, including but not limited to any representation or warranty as to the fitness for any particular purpose of the information to the fullest extent permitted by law. While every effort has been made to ensure that the information provided in this article is accurate, reliable, and complete as of the time of writing, the information provided in this article should not be relied upon to make any financial, investment, real estate or legal decisions. Additionally, the information should not substitute advice from a trained professional who can take into account your personal facts and circumstances, and we accept no liability if you use the information to form decisions.